Out of the box On-Prem Exchange Server does not support DKIM signing. Now the best way to implement DKIM signing is via a third-party tool.
Please refer to the below steps to configure the DKIM on on-prem exchange server.
Installing Exchange DKIM Signer :
- Download the latest GUI package:
https://github.com/Pro/dkim-exchange/releases/latest
- Extract it on your Server
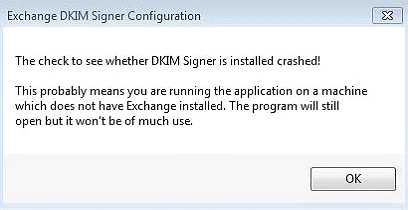
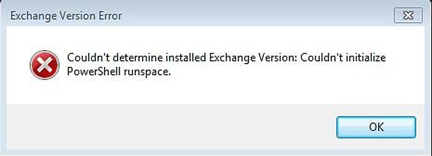
- Start Configuration.DkimSigner.exe (If you are not running this tool on Exchange Server, you will get below error)
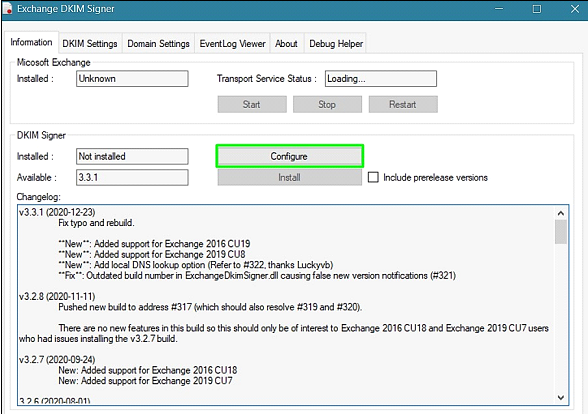
4. Select Install
(This tool is tested on local machine due to which the “Transport Service Status” is showing as “Loading” and “Install” option is greyed out.)

5. Once the installer has completed, click close.
Configuration :
- Now configure the DKIM Signer with the installed GUI. Launch the configuration executable.
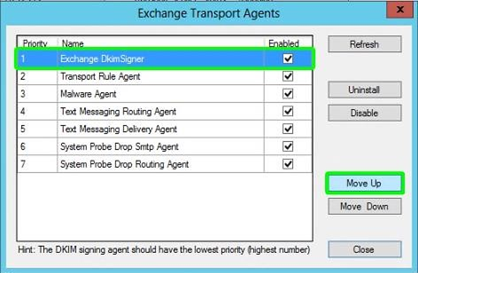
- Click Configure and move the priority of the Exchange DkimSigner to 1 and then click
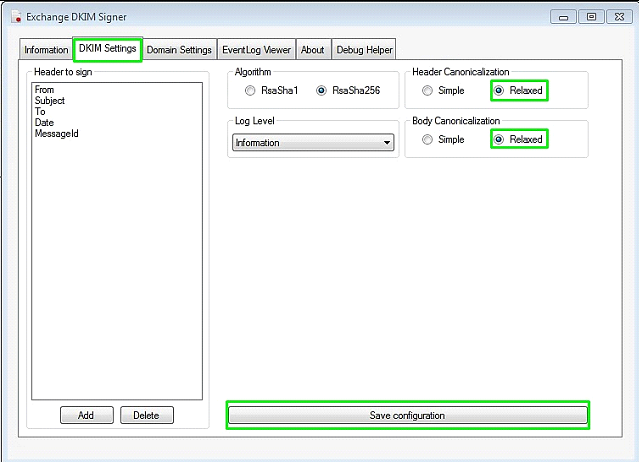
3. Go to the DKIM Settings tab and change the Header & Body Canonicalization options to Relaxed. Click Save configuration to save your changes.
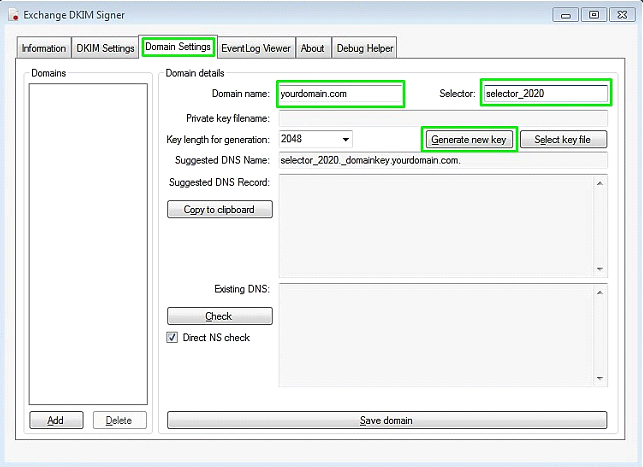
4. Now go to the Domain Settings Add your Domain name and Selector and click Generate new key. DKIM Signer will then generate new public and private DKIM signing keys based on your domain and selector.
A save window will open prompting you to save the newly generated key in “C:Program FilesExchange DkimSignerkeys”. Click Save.
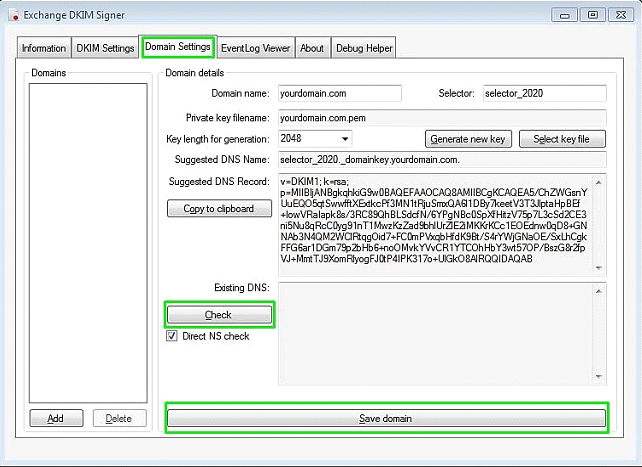
5. Now you need to publish the DKIM TXT record for your domain(yourdomain.com) with your DNS provider. Copy Suggested DNS Name and the Suggested DNS Record
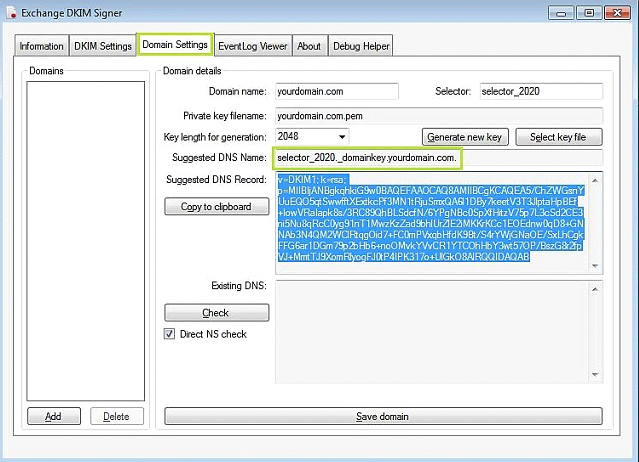
Share the copied details with your DNS provider as mentioned below
DNS record name : selector_2020._domainkey.yourdomain.com.
DNS record type : TXT
Value : v=DKIM1; k=rsa;
p=MIIBIjANBgkqhkiG9w0BAQEFAAOCAQ8AMIIBCgKCAQEA5/ChZWGsnYUuEQO5qtSww fftXExtkcPf3MN1tRjuSmxQA6l1DBy7keetV3T3JlptaHpBEf+IowVRaIapk8s/3RC89QhBLSdcf N/6YPgNBc0SpXfHitzV75p7L3cSd2CE3ni5Nu8qRcC0yg91nT1MwzKzZad9bhlUrZlE2iMKKrKC c1EOEdnw0qD8+GNNAb3N4QM2WClRtqgOid7+FC0mPVxqbHfdK9Bt/S4rYWjGNaOE/SxL hCgkFFG6ar1DGm79p2bHb6+noOMvkYVvCR1YTCOhHbY3wt57OP/BszG8r2fpVJ+MmtTJ 9XomRlyogFJ0tP4IPK317o+UlGkO8AlRQQIDAQAB
- Wait for few minutes for the record to reflect, then go back to the DKIM Signer Domain Settings tab and click Check. DKIM Signer will query your DNS record and if it is reflected, your record should now be verified as correct. Click Save Domain to save your settings.
7. Go back to the Information tab and restart the Exchange Transport Service by clicking on Restart.

DKIM Signer is now configured to sign emails originating from your domain.