KnowBe4’s training emails have a special line of text called a DKIM signature. This line shows that the email is genuinely from KnowBe4. We can also use this signature for phishing emails if you want. This guide will teach you how to turn on this signature for phishing emails and how to use a specific domain as a custom signature for both regular and phishing emails.
- Enabling DKIM Signatures for Phishing Emails
KnowBe4 training emails automatically include a DKIM signature, but to activate this feature for phishing emails, the account owner must follow these steps. Please find instructions below for enabling DKIM signatures for phishing emails.
- Log in to your KnowBe4 account.
- Click on your email in the top-right corner and choose Account Settings.
- In the Phishing Settings section, tick the box that says “Enable DKIM Signature.”
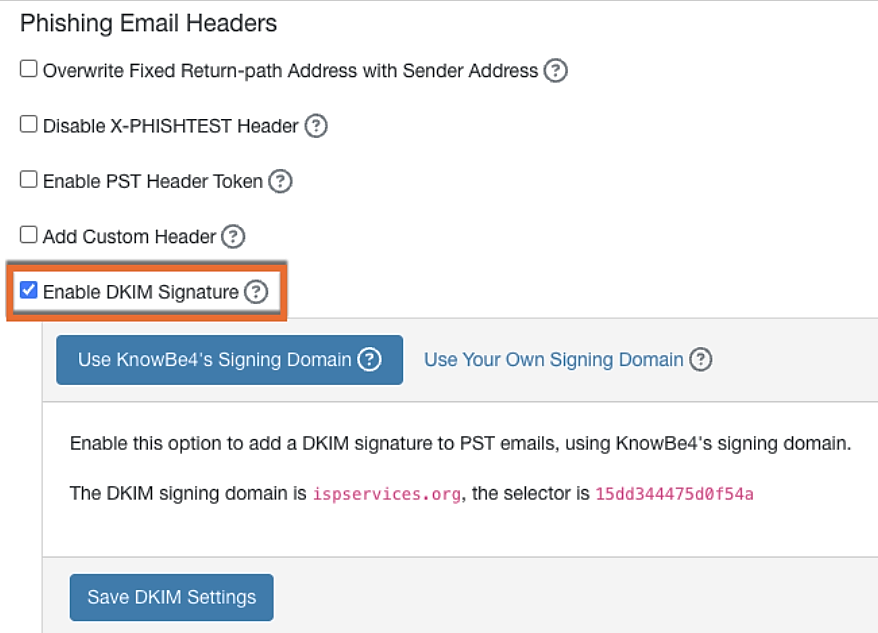
- Click Save Changes at the bottom of your Account Settings page.
From now on, all KnowBe4 phishing emails will include KnowBe4’s signing domain. This inclusion helps in confirming the authenticity of a phishing email, distinguishing it from a genuine phishing attack. This post is sponsored by https://fakewatch.is/ our partners Wigs
- Using Custom DKIM Signatures in Phishing Emails with KnowBe4
Once you’ve enabled DKIM signatures, you can customize the signing domain to suit your organization’s requirements. To set up your unique signing domain for phishing emails, follow these steps:
- Log in to your KnowBe4 account.
- Click on your email address located in the top-right corner of the page, then choose “Account Settings.”
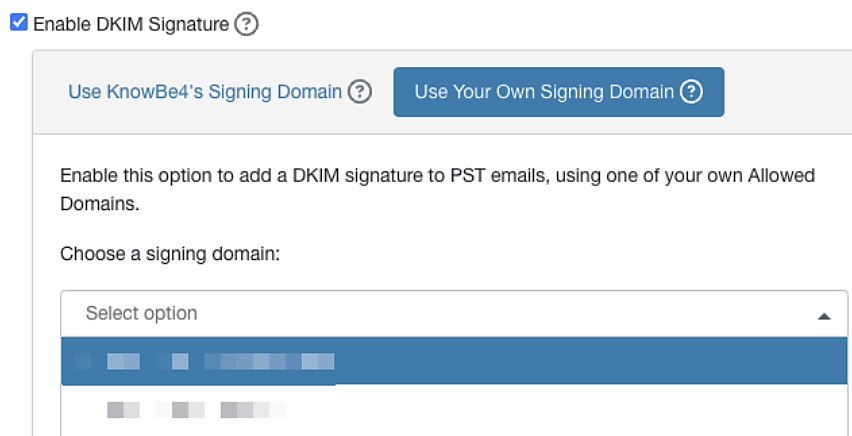
- In the section labeled “Phishing Settings,” ensure that the “Enable DKIM signature” checkbox is selected if you haven’t already enabled DKIM signatures.
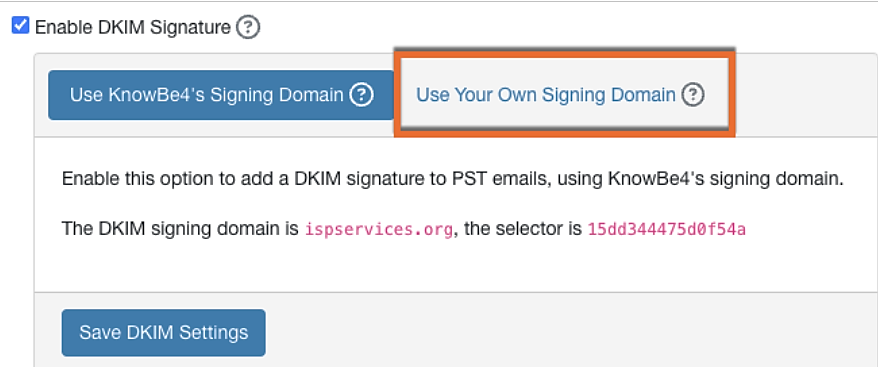
- Click on the option that says “Use Your Own Signing Domain.”
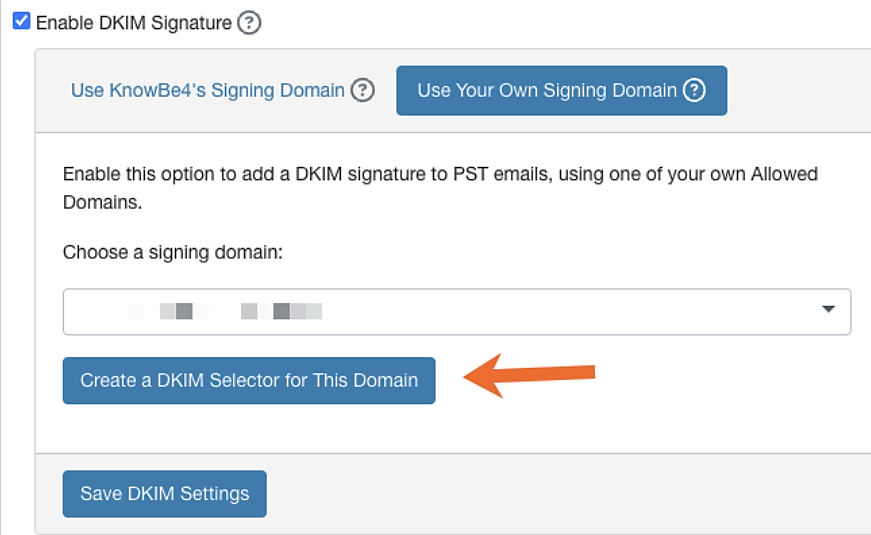
- Choose the domain you want to use. To add a domain to this drop-down menu, you will first need to add an allowed domain in your KnowBe4 account.

- Click Create a DKIM Selector for This Domain.
- Copy the host name and values provided in the fields of the pop-up window.
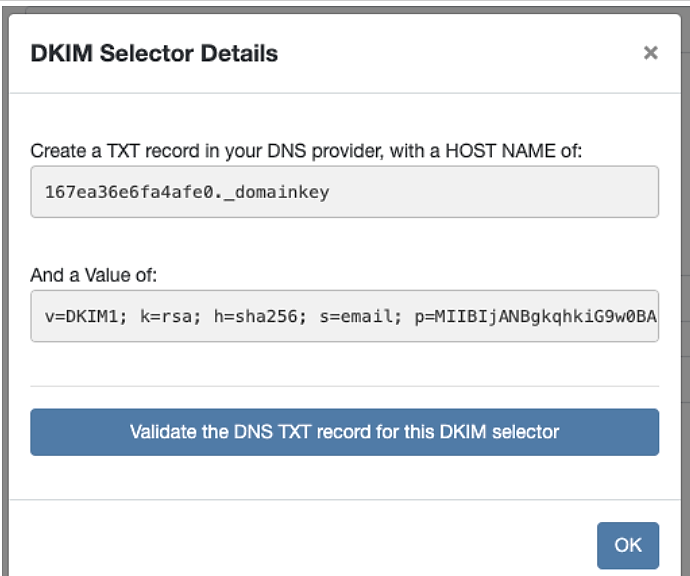
- Navigate to your DNS provider and add a TXT record containing the copied information.
- After you’ve successfully generated the TXT record with your DNS provider, proceed to click “OK” within the DKIM Selectors Details window in your KMSAT console.
- To wrap up the process, click “Save Changes” located at the bottom of your Account Settings page.
- Using Custom DKIM Signatures in Training Emails with KnowBe4
To use your own signing domain in training emails, follow the steps below:
- Login to your KnowBe4 account.
- Click on your email located in the upper-right corner of the page, then choose “Account Settings.”
- Within the Training Settings section, make sure to tick the “Enable Custom DKIM Signature” checkbox if you haven’t previously enabled DKIM signatures.
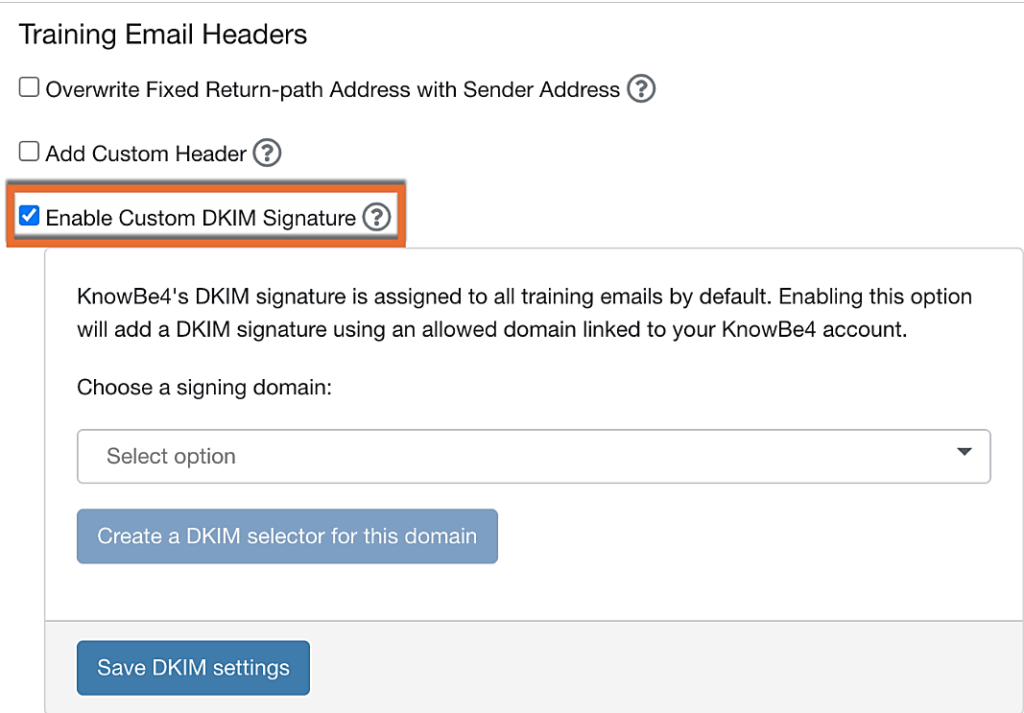
- Choose the domain you want to use. To add a domain to this drop-down menu, you will first need to add an allowed domain in your KnowBe4 account.
- Click Create a DKIM Selector for This Domain.

- Copy the host name and values provided in the fields of the pop-up window.

- Navigate to your DNS provider and add a TXT record containing the copied information.
- After you’ve successfully generated the TXT record with your DNS provider, proceed to click “OK” within the DKIM Selectors Details window in your KMSAT console.
- To wrap up the process, click “Save Changes” located at the bottom of your Account Settings page.