Here is a detailed guide on how to effectively set up and configure a custom mail domain for Netcore.
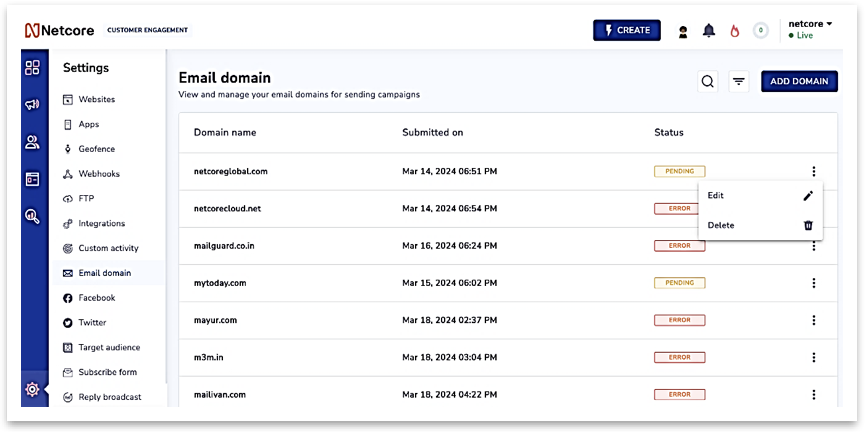
- Users may manage their current domains or add new ones in this section.
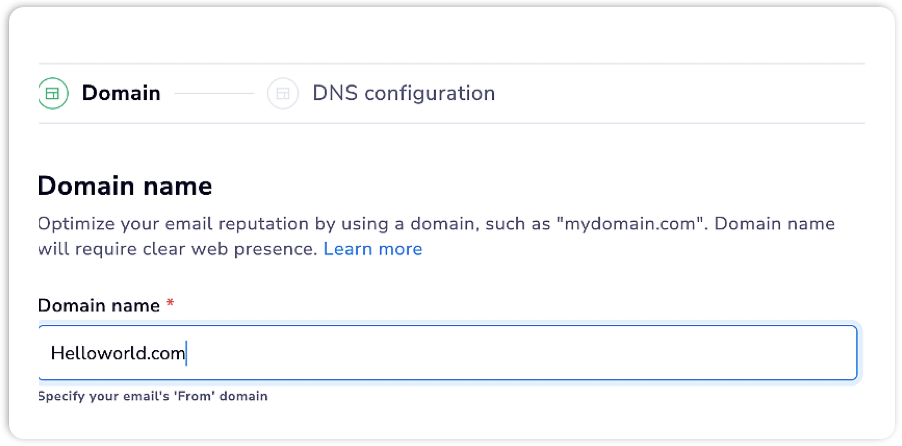
1. To add a new domain, click the “Add Domain” button.
2. You’ll then see a screen where users should enter the domain name and the associated company or brand name.
- Update the Domain.
1. To view or update the DNS settings of existing domains, click the three dots and select “Edit.”
Note:
Here are the domain status details:
Success: The domain’s DNS records have been successfully validated and are now ready for email transmission.
Pending: The domain’s DNS records are not yet verified for use in the campaign or journey modules for email sending.
Error: Domain DNS: Some records are unavailable in the campaign or journey modules for email sending as they await verification.
Migrated: These domains have been registered and transitioned from an old DNS configuration to a new one.
2. On the given screen, users will see more details and can:
a) View, download an email DNS records for necessary configuration.
b) Once configuration is complete, users can verify it by clicking the “Verify” button.
c) After successful verification, users will be prompted to set up SSL certification by clicking the “Configure SSL” button.

Note:
- If needed, the user has the option to change the hostname value and update it.
- If the hostname value is changed after verifying DNS records, the domain name will be unavailable for use because all records will need to be verified again.
- In such a case, the user needs to repeat steps 1 to 3.
- All records are required to be configured and verified.